
This could very easily be a project I would've featured on the blog..
I would have taken photos beginning to end, showed off exactly what tools were needed and used.
You would have had a detailed step by step DIY to follow...
however, this project wasn't done by me and quite frankly I feel as though this blog post is being written under duress!
ok, lol.
you know I'm kidding but I am feeling some pressure.
If you've been keeping up on IG stories, you have probably seen that I am in major purge mode.
I also posted this blog about cleaning my closet... well the time has come and I am having a HUGE yard sale to try and offset the cost of Noelle's nursery.
(I really want to get that started since she's already 2 months! she will be in that room before I know it.. eeek!)
So my mom, sister, etc. will be hosting a massive yard sale and to draw some interest I've posted about it on social media and in some local buy & sells... I wanted to post some photos, because I think we have great stuff!
Well, I posted this nightstand that my sister DIY'd last year and HOLY MOLY.
The response is kind of hilarious!
See the night stand below...

I won't lie, its a nice nightstand.
Its a really large size, sturdy, the handles are cute, but the white and marble she DIY'd herself!
and it was really easy y'all!!
The nightstand was with her boyfriends bed set and was a cherry wood colour.
See this is where I may fumble up the details as its not my project but I'm assuming she used regular white paint (she's a mis-tint kind of gal, any marked down paint cans at the hardware store will do. and I don't think she has my love of spray paint! I would've just sprayed that sucker)
Allow adequate days to dry, multiple coats will most definitely be needed.
Make sure you remove the hareware before painting, it will make your life so much easier and the project that much more professional.
Then head over to handy 'ol Amazon and pick up a marble contact paper like THIS.
Apply contact paper once paint is good and dry, pop hardware back on and BAM.
You have that ^^^^^^^^ exact nightstand.

In my original yard sale post I did write 'Please no messages, photos for reference but you must attend, no holds."
I knew our stuff was good and could possibly get a lot of attention but I have no interest in going the 'buy & sell' route right now.
I have the baby, Elliott, Marley the dog, I just can't arrange appointments and be waiting on people etc. so hopefully everything sells at this one yard sale and then I can wash my hands of the sale biz.
Even though I had said 'no messages', I expected to get a few but I was not prepared for the volume surrounding that night stand!
I must've got about 50 so far and the messages are still rolling in.
I've got all kinds of stories about why people need the night stand..
sob stories
willing to pay immediately
will pick up right now
will pay extra
etc.
etc.
etc.
I'm sorry, that is just too much pressure guys!
I cannot be responsible for someone's happiness/disappointment in such a dramatic way.
so I have just stopped responding, I have a lot on my plate at the moment and pricing/set up is taking priority!
I hope this post helps a little bit, with so many interested buyers maybe some will DIY their own or put a fresh spin on something else with that contact paper.
My sister is also working on redoing the full size dresser from the same set!
Since you're here I'll show off her progress..
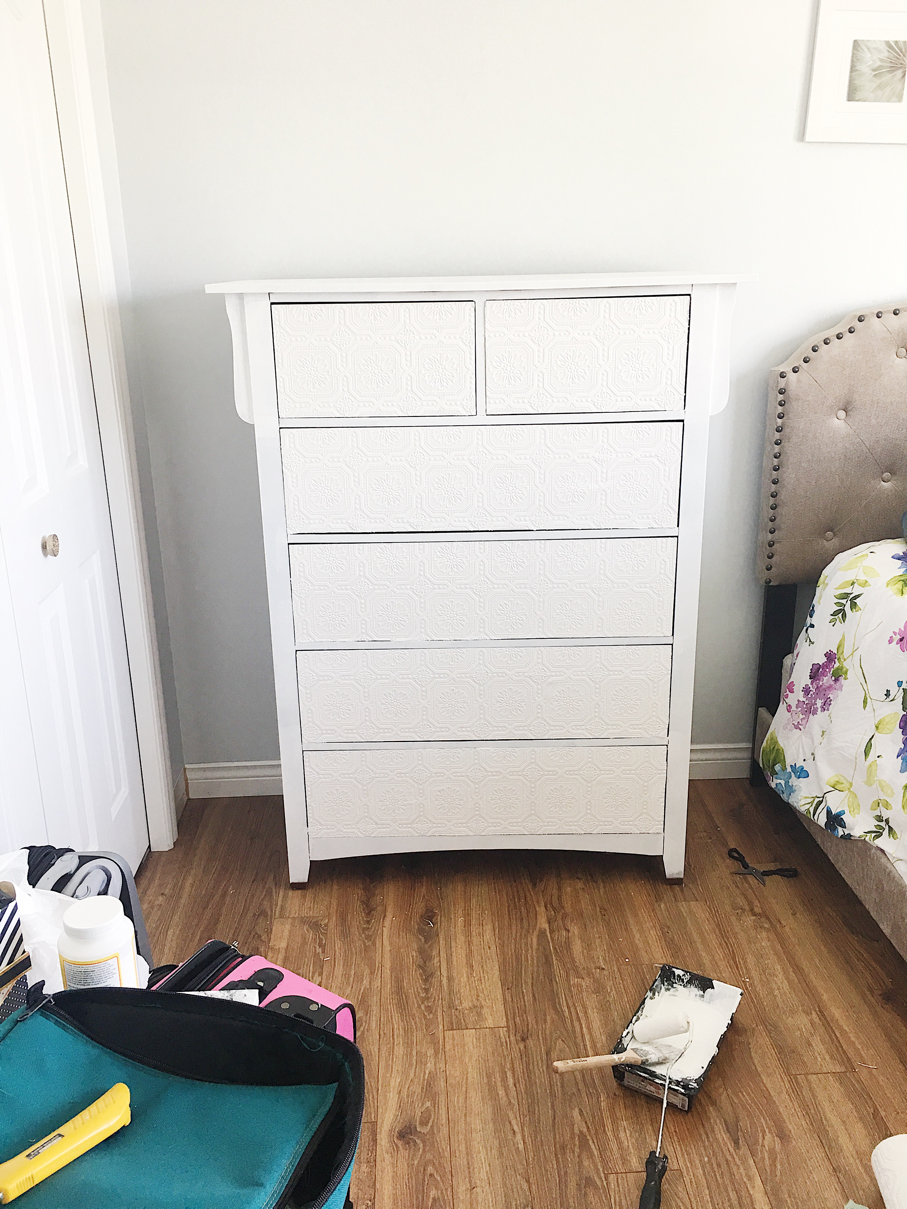
She painted it white (it did take at least 3 coats, and was kind of a pain with all the nooks and crannies)
and she has wall papered the drawers!
cute right??!

sorry I don't have any good photos!
only this sorry excuse reflection pic ^^^
but it turned out so great!
and you can see the original colour was that colour above^^ the cherry colour.
so the white paint really does make the set look brand new and modern!
HAPPY DIY-ING!
EDIT!!
She just sent me these!
Wall paper Home Depot $27 a roll
Enjoy


Post a Comment